Hello Everyone! Keely's Korner just got our Etsy store up, come check out all of our cool merchandise at this link: Keely's Korner Etsy Shop♥
Enjoy!
Wednesday, February 9, 2011
Saturday, February 5, 2011
Crochet Cloth
Hi everyone! Sorry for the lack of posts lately, I have been pretty busy trying to get my Etsy store up and running. Don't worry I'll make a post about it on here, Facebook and Twitter so you'll be able to come look at all of our cool stuff as soon as the store is up and running. Okay today I'm going to show you how to make a crochet dish cloth. Here is what you will need:
Materials
______________________________________
1 skein of COTTON yarn (synthetic and wool simply won't do for this)
Chrochet hook (every yarn is different so make sure you check the label for the recomended size)
1. First start out with a slip knot and 40 chain stiches

2. Next, single stich back and forth accross the chain adding on layers. Do this about 27 times (Or untill you have a perfect square). Next knot off the end and do more single stiching all around the edge (This gives it a finished look)

You CAN sew a scratchy type fabric to one side like terry cloth to give it some scrubbing power but personally I perfer it just to be yarn. Yay!! Now you have this super easy and extremly cute kitchen cloth♥
(psst... If your a little fuzzy on how to single crochet here is an easy-to-follow tutorial http://www.anniesattic.com/crochet/content.html?content_id=68 )
Tuesday, January 25, 2011
Fabulous Fabric Necklace
Hey all! Today I'm going to show you how to make a fabric necklace! I have seen these for $50+ so I'm sure you won't ubject to making one for less than $10.
Materials
1/4 yard cotton fabric
3 feet ribbon cut in half
Decorations (I used glue-on gems but you could also use buttons or ribbon ect.)
Step 1. First you are going to need to make a pattern. (I just cut a rough shape out of folded newspaper and trim it as needed)

Step 2. Now, pin the pattern to the fabric and cut it out (remember to cut slightly farther away from the pattern so you have room for the seam)

Step 3. Now, flip the fabric so that the 2 printed sides are on the inside and pin the whole gig together. Sew around the outside (leaving the places for the ribbon and a turning place un-sewn)
Flip right-side out.

Step 4. Iron it flat (this will make sewing up the open space easier)

Step 5. Turn the turning place in and iron it. Sew it shut and continue sewing untill you have reached the beginning point again (make sure not to sew over the places for the ribbon) stuff a pice of ribbon in to each opening. Sew over ribbon to keep it in place.

Step 6. Glue or sew on decorations.
 Ta da! You'r marvelous necklace is done!! I hope you all love your jewlery With Love, Keely's Korner♥
Materials
1/4 yard cotton fabric
3 feet ribbon cut in half
Decorations (I used glue-on gems but you could also use buttons or ribbon ect.)
Step 1. First you are going to need to make a pattern. (I just cut a rough shape out of folded newspaper and trim it as needed)

Step 2. Now, pin the pattern to the fabric and cut it out (remember to cut slightly farther away from the pattern so you have room for the seam)

Step 3. Now, flip the fabric so that the 2 printed sides are on the inside and pin the whole gig together. Sew around the outside (leaving the places for the ribbon and a turning place un-sewn)
Flip right-side out.

Step 4. Iron it flat (this will make sewing up the open space easier)

Step 5. Turn the turning place in and iron it. Sew it shut and continue sewing untill you have reached the beginning point again (make sure not to sew over the places for the ribbon) stuff a pice of ribbon in to each opening. Sew over ribbon to keep it in place.

Step 6. Glue or sew on decorations.

Saturday, January 15, 2011
Easy Birthday Blankie
Hello Everybody! Okay, on the 14th was my little brother Greyson's 3rd Birthday, and for a present I decided to make him this super easy special blankie. He uses this thing WAY more that I figured he would so overall I think it was a good pick. Okay now, that I have went on about how cool thins thing and how easy it is to make, I have to tell you how to make one of your own♥
You’re going to need . . . .
For 60in. wide fabric 1 yard of each
For 45in. wide fabric 1 1/2 yards of each
(I bought flannel for the inside and fuzzy velour for the outside)
Pins
Scissors
Sewing machine
1. Trim both fabrics so they are even on all four sides.
2. Pin it so the sides you want to be on the outside, are on the inside.
3. Sew up the sides leaving one side open.
4. Flip "bag" right side out. Turn in un-sewed edges and pin.
5. Sew alongside leaving about 1/2 in. (this will make sewing up the fourth side look more even)
6. TA-DA!! You have a completely adorable and super easy blanket in 5 steps!
 Here is what my finished product ended up looking like. (The fleece is the polka dot, and the velour is the light blue)
 This isn't the owner (he was to impatient to stand still long enough for a picture) So his big sister asked for the modeling gig.
I hope you all had lots of fun learning how to make a Easy Blankie♥
You’re going to need . . . .
For 60in. wide fabric 1 yard of each
For 45in. wide fabric 1 1/2 yards of each
(I bought flannel for the inside and fuzzy velour for the outside)
Pins
Scissors
Sewing machine
1. Trim both fabrics so they are even on all four sides.
2. Pin it so the sides you want to be on the outside, are on the inside.
3. Sew up the sides leaving one side open.
4. Flip "bag" right side out. Turn in un-sewed edges and pin.
5. Sew alongside leaving about 1/2 in. (this will make sewing up the fourth side look more even)
6. TA-DA!! You have a completely adorable and super easy blanket in 5 steps!


I hope you all had lots of fun learning how to make a Easy Blankie♥
Sunday, January 2, 2011
Yarn Bangles
Hello, today I will be showing you how to create these oh so chic yarn bangles.
You will be needing:
Yarn (roughly 3 yards long)
Scissors
Hot glue gun
Bangle (it can be wood plastic ect.)
My bangles, I got for about $3 for a 3 pack at Fred Meyers, but you can also get old wood ones at thrift shops, Goodwill or Salvation Army.
1. First, measure out your yarn and knott 1 end. Wrap the yarn in to a ball starting at the un-knotted end (wrapping all of the yarn in to a ball will make it easier to wind around the bangle). Hot glue knotted end of the yarn inside of the braclet.

2. Losely wind the ball of yarn around the bangle, making sure that there are no gaps.

3. Finish winding the bangle in yarn, knot the end.

4. Clip string as CLOSE as possible to the knot.

5. Add a dab of hot glue on the inside of the bangle.

6. Firmly press knotted end in to hot glue. Hold untill set.

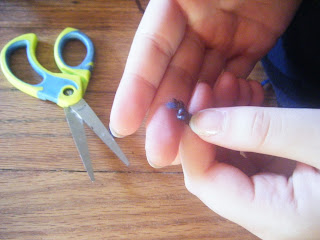
7. This is what it should look like is what it should look like when the glue is dried. Pull off any lose glue strings.

8. If you don't want any extra decorations, then congratulations! Your Yarn bangle is done!

9. But, for all of you girls who want a more interesting bracelet. Here we go! I knotted the ends of 2 different colored yarns together. Clip extra off ends.

10. Glue knotted end on inside of bangle, wrap widley around bangle. (This makes long slanting stripes)

11. Hot glue knotted end inside of bangle. Hold untill set.

And ta-da!! You have ADORABLE yarn bangles that are cute for a casual movie with the girls, or a night at a party.

I hope you all enjoyed todays tutorial on yarn bangles, with love,
Keely's Korner♥
Saturday, January 1, 2011
Bad Guy cookies
Hello everyone, today I'm going to give you a recipe for Bad Guy Cookies. First I must say, that the original name for these cookies is Buckeye Cookies, but my little brother being only 3, pronounces them as the hilarious Bad Guy Cookies, so to be fair to him that is what I will call them :)
Ingredients
1/2 cup creamy peanut butter
2 tablespoons and 2 teaspoons butter, softened
1/4 teaspoon vanilla extract
3/4 cup and 1 tablespoon and 1 teaspoon semisweet chocolate chips
2 teaspoons shortening
1-1/3 cups confectioners' sugar
Directions
.
1. In a medium size bowl, mix peanut butter, butter, vanilla, and confectioners' sugar (don't worry it's supposed to be a little stiff).
2. Shape into balls and place on a pan covered with wax paper. If your cookies are a little sticky, go ahead and pop 'em in the refrigerator until they are firm enough to work with.
3. In the microwave, melt chocolate and shortening. Dip pre-prepared balls in to chocolate. Shake off extra chocolate and place on pan.
4. Put the pan in the fridge or if you’re in a hurry, you can put them in the freezer. Let stand until chocolate is set.
Voila! You have amazing Bad Guy Cookies. I hope your guests (or just you) enjoy the sweet treats.
Adapted from Buckeye Cookies lll on Allrecipes.com
Friday, December 31, 2010
Disco Nails!
Hi everyone!
For my first craft on my blog I'd like to do this one I did with a couple of friends a few months ago. It is deceivingly easy and enormously cute! These are a great idea for all of you fashionistas who MUST get noticed ♥
1. First, you’re going to want to clip, file and clean your nails to perfection. (Dirty nails don't hold polish as well as clean ones do, and they just look EW)
2. Next take a quick jump to the store and grab a packet of nail glitter. (I got a 12 pack. in the craft isle for cheaper than the 1 little box in the beauty section.) They come in dozens of colors so take your pick.
3. Add a coat of clear fingernail polish to the nail (this makes it so the glitter sticks to the nail) and pour a little glitter on top. Shake off access glitter on to a piece of paper. (The paper is so you can pour the extra glitter back in to the container. Why waste it?) Your going to want to do this quickly because if the clear polish dries before the glitter is added it will not stick, so it's best to do 1 nail at a time.
4. After all of your nails have been drowned in glitter, let them sit for 15 min. (this makes it so the glitter has a lesser chance of flaking off)
5. Once your nails have had an opportunity to dry, add another coat of clear polish on top (this acts as a barrier to keep the glitter on longer)

And voila! You have party perfect nails (I told you it was easy right?) The pic above is what mine looked like when we were done, but trust me, the picture does not do them justice, they were blinding when I was done!!!
NOTE: The smaller the size of the glitter the better. This way, if a peice of glitter comes off its less noticeable ♥
Subscribe to:
Posts (Atom)